YOLOv5 on Customized Teapots Dataset
Recently, I have been working on edge-side computer vision models (🚗,📱), and YOLOv5 with its outstanding computation speed and accuracy quickly fit into my list. I have been working with dataset in Open Image for a while, but sometimes, what you really want is just a little subset of it, rather than the entire hundreds GB with 100,000 classes. In this project, we only looking at one class: teapot🍵, fetching only data from that class quickly from OpenImage database and transfer learning on our favorite model: YOLOv5
This project will be in four parts: Data Fetching, Data Formatting & Processing, Model Training and Model Predictions
Table of Content
- Data Fetching: OIDv4_ToolKit
- Data Formatting & Processing: RoboFlow
- Model Training
- Model Prediction
Data Fetching
Normally, I would write a scrapper with beautiful soup, but I have found this amazing open-source data fetching tool called OIDv4_ToolKit, which explicitly gathers all the data we need for certain classes in Open Images Dataset V4.
However, this software only supports V4, as the name states, let me know if you guys find a more general tool that works for all versions in Open Image
The code follows will be effective on Google Colab, for the universal operating environment or equivalent OS in Ubuntu.
First, we need to clone the software and install all the dependencies
!git clone https://github.com/EscVM/OIDv4_ToolKit.git
!pip install -r OIDv4_ToolKit/requirements.txt
Then you can go to its Doc page and scapes as desires. Here, since we only demonstrate on Teapot dataset, we run this command:
!python OIDv4_ToolKit/main.py downloader --classes Teapot --type_csv all --multiclasses 1
The Teapot after --classes is the classes of data we want, the name must aligns exactly with Open Images website labels.
The --multiclasses 1 is making sure that all the data collected will be in the same folder. It is redundant here, but convenient when you have more than 1 class.
After you run this command, a prompt will show up like this:
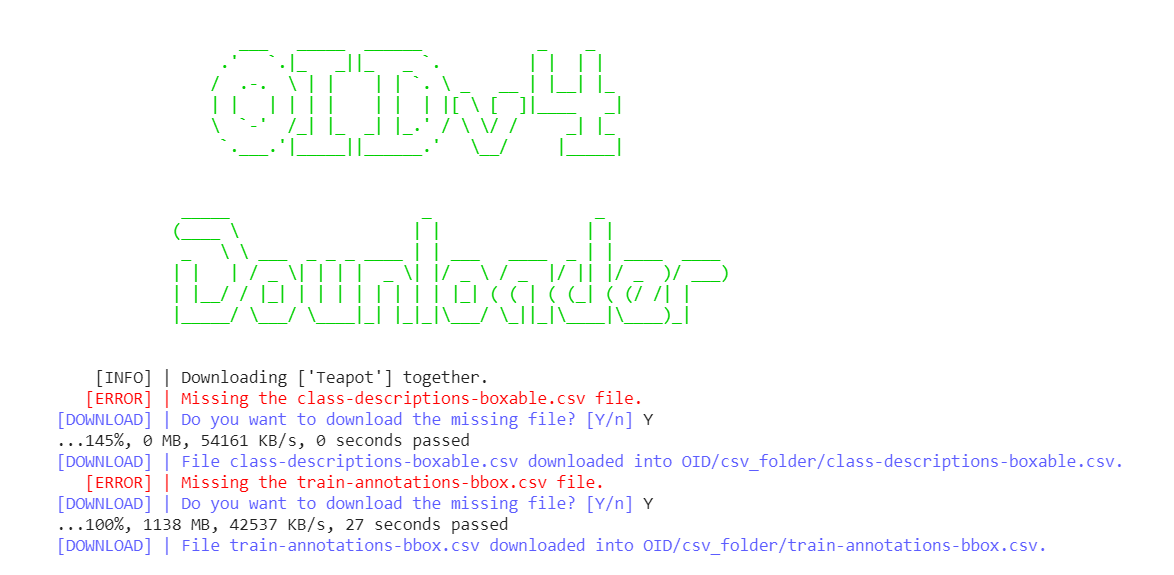
You need to input Y three times to keep the program forward, for training, testing and validation respectively.
after that, the date will be downloaded to folder OID/Dataset/, run this command to download all dataset from Colab to local:
from google.colab import files
!zip -r /content/file.zip /content/OID/Dataset/
files.download("/content/file.zip")
Then, you will have a file.zip download to you local setup. Inside, you will find each folder for train, test and validation, which contains the images and bounding box information (.txt) inside.
Take on txt file for example:
Teapot 361.516032 2.175744 770.8211200000001 358.4448
If you follows my previous post, you will recognize that this is YOLO format, where the first Teapot is the class name, and 361.516032 2.175744 is location of bounding box bottom left corner, 770.8211200000001 358.4448 is location of bounding box top right corner
Data Formatting & Processing
Since YOLO need to recognize the data to proceed the training process, we have to convert our data and labels in specific PyTorch YOLOv5 format. The PyTorch YOLOv5 takes a data.yml file to locate train, test, validate data and labels, which also arranged in a specific format. Luckily, we don’t have to worry about he nuance with the help of RoboFlow.
- Go to RoboFlow
- Create a free account
- Create a dataset following the instructions
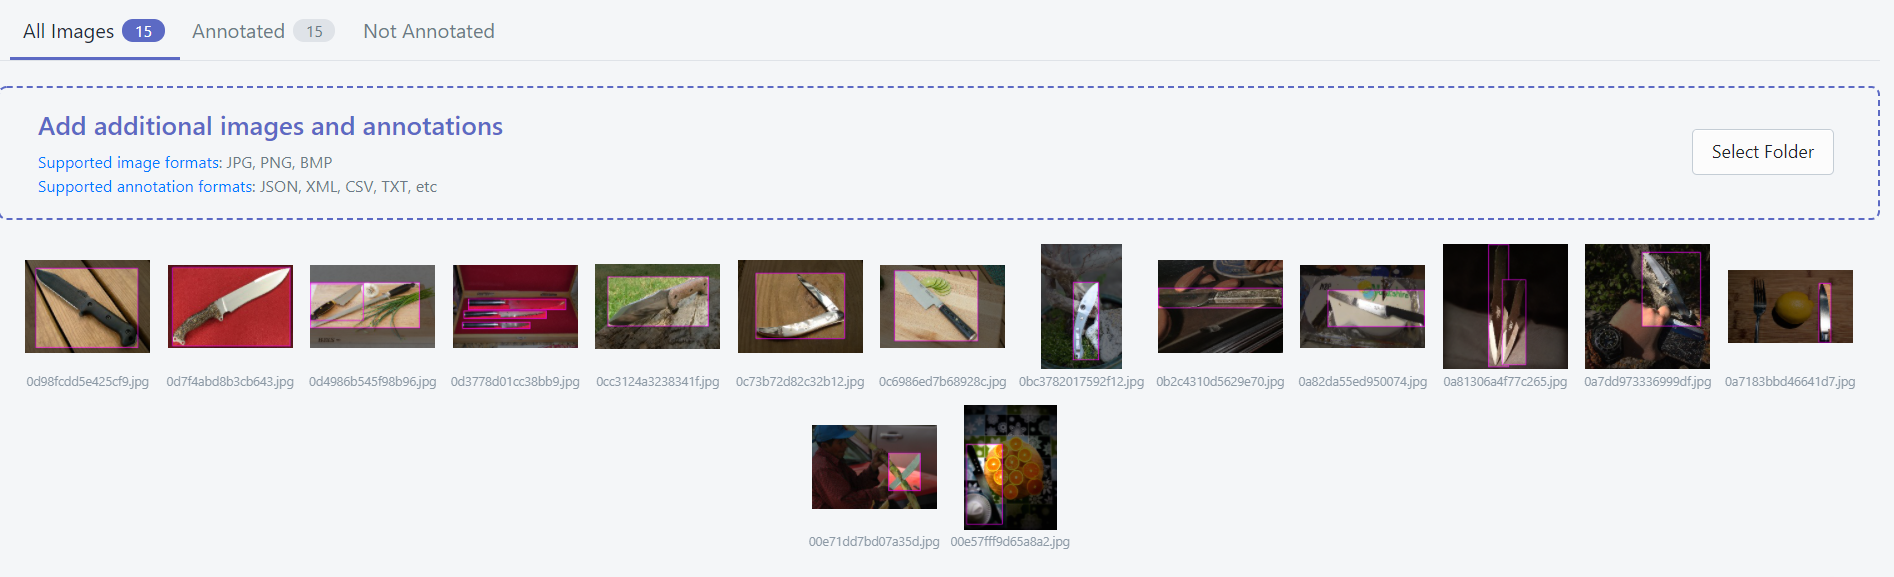
- Drag and drop all the images in all three folder, then the labels, you will find that RoboFlow does the bounding box label automatically for you 🤟
- After uploading and labeling, press “Finish Upload” on top right corner, customize your train test split, usually we leave it with 70-20-10 as default.
- Continue, then “Generate” on top right corner with a version name
- After the web does all its works, hit “show download code”
-
Copy the command there. That command is what all this struggle actually for. It will looks like this:
!curl -L "SOME-CHARACTERS" > roboflow.zip; unzip roboflow.zip; rm roboflow.zip - Paste that to our colab and run, you will find train, test, valid folders downloaded for you, with
data.ymlof course
Now, we can train our models! Yeaaaaaa! 🍕
Model Training
As usual, clone YOLOv5 to Colab and test our GPU. Don’t forget to set Colab runtime type to GPU for it will be painful ☠.
import torch
from IPython.display import Image  # for displaying images
from utils.google_utils import gdrive_download  # for downloading models/datasets
print('torch %s %s' % (torch.__version__, torch.cuda.get_device_properties(0) if torch.cuda.is_available() else 'CPU'))
Then, navigate into yolov5 folder and download all its models: ‘yolov5x.pt’, ‘yolov5m.pt’, ‘yolov5s.pt’ and ‘yolov5l.pt’. Besides their difference in sizes, they also different in structure and performances. We have already talked about this in previous post.
%cd yolov5/
!weights/download_weights.sh
Now we TRAIN!
!python train.py --img 640 --batch 8 --epochs 30 --data ../data.yaml --weights yolov5s.pt --device 0 --cfg ./models/yolov5s.yaml
This command specify that we will train our model at image size 640px, 8 batches, 30 epochs, from data.yaml, pretrained with yolov5s.pt and its structure yolov5s.yaml. You can change the structure in yolov5s.yaml. Here, we highly recommend pretain with one of the models to achieve good result even in limited data and resources. You can set --weight '', which randomize the weight initialization, but the result will be really poor. Trust me on this.
When training, it will looks like this:
Where first you can see the structure of the model you are training, then the training by epochs.
After training, you will find you model saved in address at the prompt bottom. We will use the best.pt model to test our model
The model will be saved in runs/train/exp/weights/best.pt; the second time you train it, it will be saved at runs/train/exp2/weights/best.pt. The more you train, the more increments on exp holder name.
Model Prediction
At last, run this
!python detect.py --weights runs/train/exp/weights/best.pt --conf 0.4 --source ../test/images/
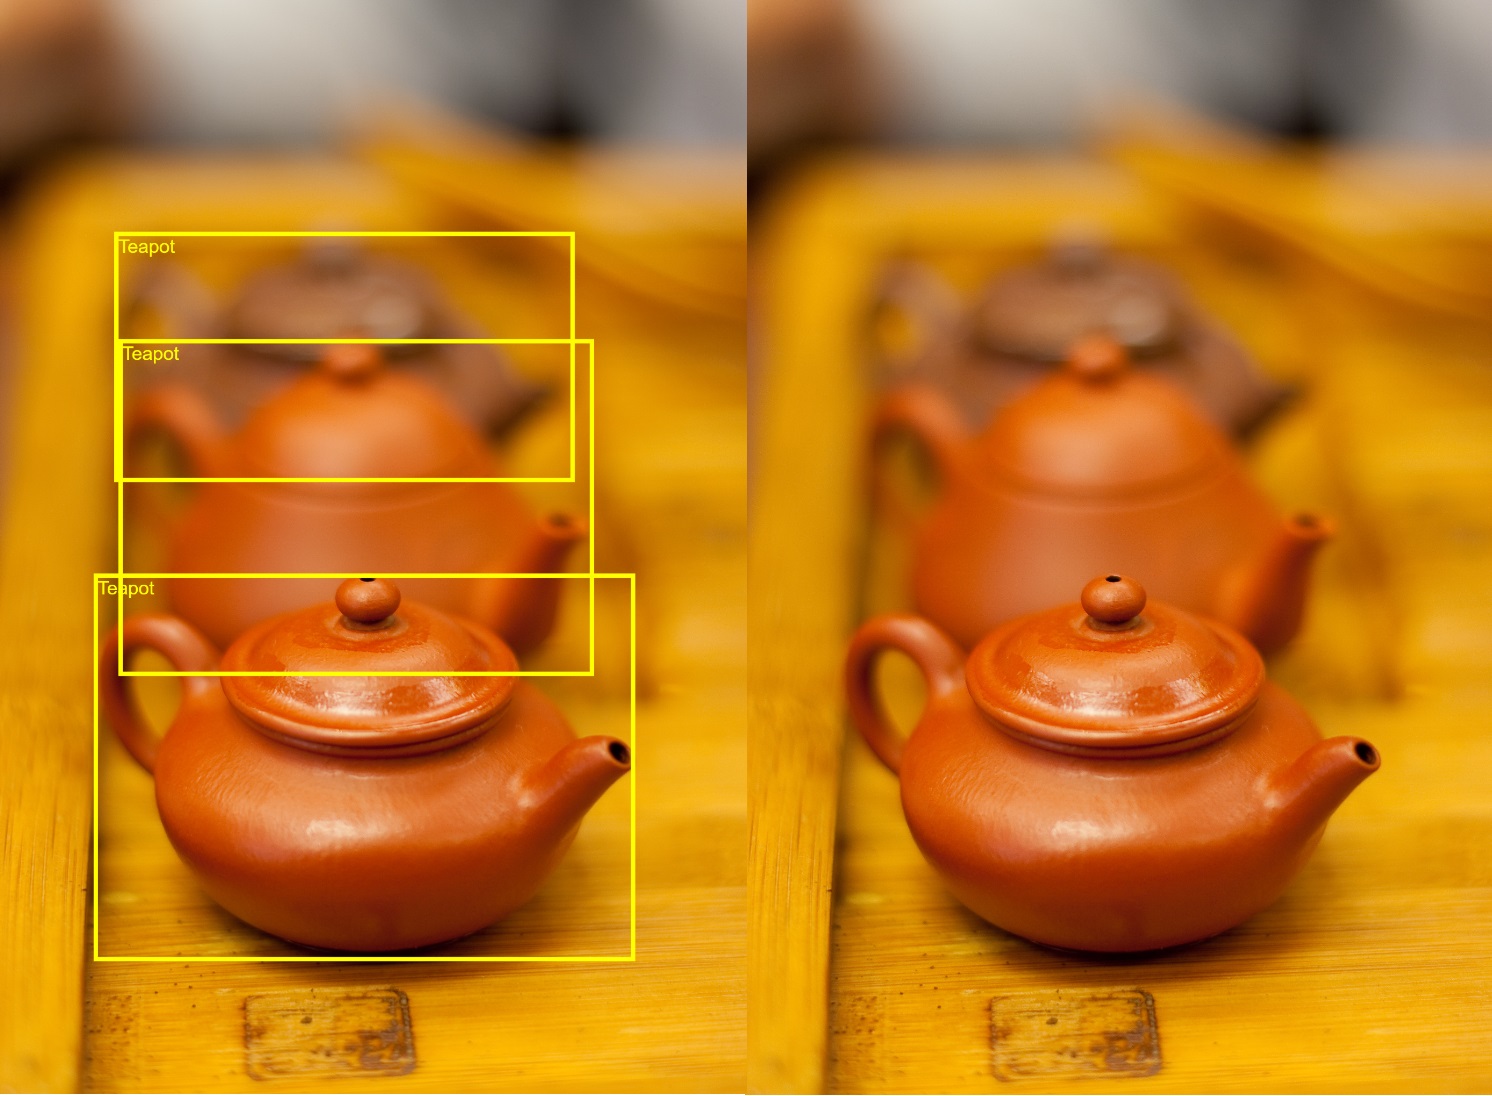
This command predicts base on model runs/train/exp/weights/best.pt, taking images from source file ../test/images/, and bounding box all predictions have confidence larger or equal to 40%
The prediction will be super fast as it is.
Finally
Well, we are done, take a rest and have a cup of tea 🍵. You know where to find 😋
If you are interested in my projects or have any new ideas you wanna talk about, feel free to contact me!

A BEER would be perfect, but remember NO CORONA! 🍻