
Social Distance Detection Application - Phase 1
Project Show Case

Project Baseline
In this project, we are building a robust program detecting if people are properly social distanced in time inside a video, especially for survilance cameras. This project is inspired by the current situation when COVID goes rampage and US government does poorly containing the virus.
Mask ON 😷.
This app uses machine learning techniques to identify people that are poorly social distanced, analyse risk factors in the environment and marks the public facilities that are vulnerable in design.
Dependencies
We are using Detectron2 and pretrained on COCO dataset, tuned with Pytorch framework and TorchVision, image processing with CV2
!pip install cython pyyaml==5.1

# install detectron2:
!pip install detectron2==0.1.3 -f https://dl.fbaipublicfiles.com/detectron2/wheels/cu101/torch1.5/index.html
import detectron2
from detectron2.utils.logger import setup_logger
setup_logger()

# import some common libraries
import numpy as np
import cv2
import random
from google.colab.patches import cv2_imshow
import matplotlib.pyplot as plt

# import some common detectron2 utilities
from detectron2 import model_zoo
from detectron2.engine import DefaultPredictor
from detectron2.config import get_cfg
from detectron2.utils.visualizer import Visualizer
from detectron2.data import MetadataCatalog

import pandas as pd
import numpy as np
import os
Model Extraction
Break imported video into frames
With customized num_frames and save into dir frames/ with their indexes, such as frames/1.png
cap = cv2.VideoCapture(video_path)
cnt=0
if (cap.isOpened()== False):
  print("Error opening video stream or file")

ret,first_frame = cap.read()
while(cap.isOpened()):
  # Capture frame-by-frame
  ret, frame = cap.read()

  if ret == True:
    #save each frame to folder
    img = 'frames/'+str(cnt)+'.png'
    cv2.imwrite(img, frame)
    cnt=cnt+1
    if(cnt==num_frames):
      break

  # Break the loop
  else:
    break
Get Predictor from Detectron2 Model
Get model prediction with threshold of accuracy 0.9
cfg = get_cfg()

# add project-specific config (e.g., TensorMask) here if you're not running a model in detectron2's core library
cfg.merge_from_file(model_zoo.get_config_file("COCO-Detection/faster_rcnn_R_50_C4_3x.yaml"))
cfg.MODEL.ROI_HEADS.SCORE_THRESH_TEST = 0.9  # set threshold for this model

# Find a model from detectron2's model zoo. You can use the https://dl.fbaipublicfiles... url as well
cfg.MODEL.WEIGHTS = model_zoo.get_checkpoint_url("COCO-Detection/faster_rcnn_R_50_C4_3x.yaml")
predictor = DefaultPredictor(cfg)

Output Format:
{'instances': Instances(num_instances=10, image_height=720, image_width=1280, fields=[pred_boxes: Boxes(tensor([[ 659.0226,  136.8566,  716.4711,  314.3341],
        [ 984.6653,  193.3174, 1135.5411,  577.7169],
        [ 465.6011,   82.0844,  548.6378,  309.4335],
        [1093.9060,  207.6155, 1241.8287,  665.1588],
        [ 445.4296,   92.9271,  483.0637,  245.6754],
        [ 149.8339,   84.5909,  185.1481,  183.5686],
        [ 686.6102,  241.8603,  751.9183,  339.2359],
        [1000.8358,  122.0578, 1088.5386,  315.8353],
        [ 374.9348,   70.8178,  462.5870,  127.9092],
        [ 535.2610,  101.2152,  571.6677,  242.2153]], device='cuda:0')), scores: tensor([0.9986, 0.9971, 0.9944, 0.9941, 0.9897, 0.9739, 0.9634, 0.9527, 0.9287,
        0.9253], device='cuda:0'), pred_classes: tensor([ 0,  0,  0,  0,  0,  0, 28,  0,  2,  0], device='cuda:0')])}
Select Only “Person”
All the boxes are the four corners coordinates for each detection box, and pred_classes are categorical encoding for each object category. Our focus is just person, which labeled with 0
Noted that PIL and CV2 color are inverted. It shows to be red for all people right now, but actually in blue. Can also be solved by RGBtoBRG
def mid_point(img,person,idx):
  #get the coordinates
  x1,y1,x2,y2 = person[idx]
  _ = cv2.rectangle(img, (x1, y1), (x2, y2), (255,0,0), 2)

  #compute bottom center of bbox
  x_mid = int((x1+x2)/2)
  y_mid = int(y2)
  mid   = (x_mid,y_mid)

  _ = cv2.circle(img, mid, 5, (255, 0, 0), -1)
  cv2.putText(img, str(idx), mid, cv2.FONT_HERSHEY_SIMPLEX,1, (255, 255, 255), 2, cv2.LINE_AA)

  return mid

Distance In Frame
This part, we just calculate based on image distance, but can be better implemented in the future on real-life metrics. Also filtered by threshold.
%%time
from scipy.spatial import distance
def compute_distance(midpoints,num):
  dist = np.zeros((num,num))
  for i in range(num):
    for j in range(i+1,num):
      if i!=j:
        dst = distance.euclidean(midpoints[i], midpoints[j])
        dist[i][j]=dst
  return dist

%%time
def find_closest(dist,num,thresh):
  p1=[]
  p2=[]
  d=[]
  for i in range(num):
    for j in range(i,num):
      if( (i!=j) & (dist[i][j]<=thresh)):
        p1.append(i)
        p2.append(j)
        d.append(dist[i][j])
  return p1,p2,d
Code Person Below Thresholds as Red
This code draw a red square for all those people below threshold
def change_2_red(img,person,p1,p2):
  risky = np.unique(p1+p2)
  points = []
  for i in risky:
    x1,y1,x2,y2 = person[i]
    _ = cv2.rectangle(img, (x1, y1), (x2, y2), (0,0,255), 2)
    points.append((int((x1+x2)/2), int(y2)))
  return img, points

Video and Picture Heatmap
We are using the Heatmappy library for now, to draw heatmap on each frame. For each point, you can customize the radius, intensity and opacity when you pass parameters into the Heatmapper with heatmapper = Heatmapper(point_diameter=..., point_strength=..., opacity=...)
The heatmap point will starts from blue color. With more overlap it has with other circles, it will transit from blue to green, yello then red.
For each frame, we remeber the location where people are not properly social distanced, and draw a heat point on those locations, so that we can see the heatmap aggregates with time, and indicates the area that is dangerous
!pip install heatmappy

from heatmappy import Heatmapper

from PIL import Image

example_points = [(100, 20), (120, 25), (200, 50), (60, 300), (170, 250)]
example_img_path = 'cat.jpg'
example_img = Image.open(example_img_path)

heatmapper = Heatmapper()
heatmap = heatmapper.heatmap_on_img(example_points, example_img)
heatmap.save('heatmap.png')

Production Stream
Now we have everything ready, let’s wire each pieces together!
import os
import re
from heatmappy import Heatmapper
from PIL import Image
names=os.listdir('frames/')
names.sort(key=lambda f: int(re.sub('\D', '', f)))

# Heatmaps to /heatmap
!rm -r heatmap/*
!mkdir heatmap/

# All processes for heatmap and detection on each frames
def find_closest_people(name,thresh, all_points=[], keep_points=1000, diameter=40, strength=0.2, o=0.55):
  img = cv2.imread('frames/'+name)
  outputs = predictor(img)
  classes=outputs['instances'].pred_classes.cpu().numpy()
  bbox=outputs['instances'].pred_boxes.tensor.cpu().numpy()
  ind = np.where(classes==0)[0]
  person=bbox[ind]
  midpoints = [mid_point(img,person,i) for i in range(len(person))]
  num = len(midpoints)
  dist= compute_distance(midpoints,num)
  p1,p2,d=find_closest(dist,num,thresh)
  img, points = change_2_red(img,person,p1,p2)
  # cv2.imwrite('frames/'+name,img)
  all_points.extend(points)

  # lose previous points
  if(len(all_points)>keep_points):
    all_points = all_points[len(all_points)-keep_points:]

  # draw heatmap
  heatmapper = Heatmapper(point_diameter=diameter, point_strength=strength, opacity=o)
  img = cv2.cvtColor(img, cv2.COLOR_BGR2RGB)
  h_img = Image.fromarray(img)
  heatmap = heatmapper.heatmap_on_img(all_points, h_img)
  heatmap.save('heatmap/'+name)
  return 0

# Labeling each frame
from tqdm.notebook import tqdm
thresh=100
_ = [find_closest_people(names[i],thresh) for i in tqdm(range(len(names))) ]

# Video making
video_dir = 'heatmap/'
frames = os.listdir(video_dir)
frames.sort(key=lambda f: int(re.sub('\D', '', f)))

frame_array=[]

for i in tqdm(range(len(frames))):

    #reading each files
    img = cv2.imread(video_dir+frames[i])
    # img = cv2.cvtColor(img,cv2.COLOR_BGR2RGB)

    height, width, layers = img.shape
    size = (width,height)

    #inserting the frames into an image array
    frame_array.append(img)

out = cv2.VideoWriter('sample_output.mp4',cv2.VideoWriter_fourcc(*'DIVX'), 25, size)

for i in range(len(frame_array)):
    # writing to a image array
    out.write(frame_array[i])
out.release()

Interesting Discovery
Detectron2 is also suitable for Semantic Segmentation with convience. Can easily produced with:
# Inference with a panoptic segmentation model
cfg = get_cfg()
cfg.merge_from_file(model_zoo.get_config_file("COCO-PanopticSegmentation/panoptic_fpn_R_101_3x.yaml"))
cfg.MODEL.WEIGHTS = model_zoo.get_checkpoint_url("COCO-PanopticSegmentation/panoptic_fpn_R_101_3x.yaml")
predictor = DefaultPredictor(cfg)
panoptic_seg, segments_info = predictor(img)["panoptic_seg"]
v = Visualizer(img[:, :, ::-1], MetadataCatalog.get(cfg.DATASETS.TRAIN[0]), scale=1.2)
out = v.draw_panoptic_seg_predictions(panoptic_seg.to("cpu"), segments_info)
cv2_imshow(out.get_image()[:, :, ::-1])

MORE To Come!
- Phase 2:
-
Customizable methods for bird view distance mesuring:
Currently, we are using predefined spacial library measured in Euclidean distance, but more elastic and robust computer vision can be used for more accurate distance measuring
-
Make reference height and measure distance to reference objects:
The distance we have right now is relative to image, not to reality. We can use the imformation from Detectron2 about the other objects as a reference, and measure distance between people relative to it. e.g. car in the picture can be height of 1m, we measure the real-life distance based on car-height-to-people-distance ratio
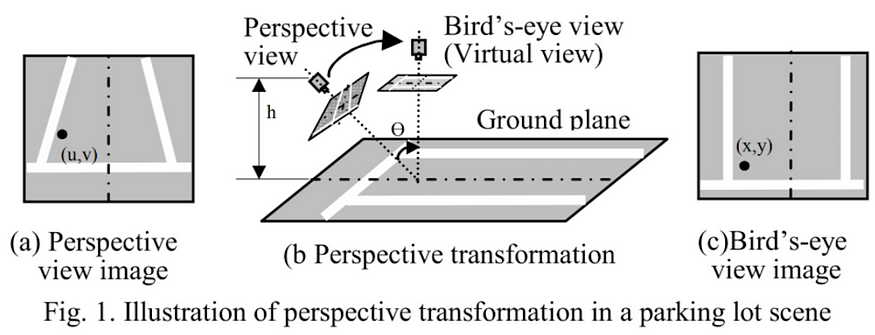
Bird View Illustration -
Better heatmap/hotspot in frame:
Currently, the heatmap is drawn as circles, but better representation can be circles that align with ground level in video
-
More Datasets:
Make product robust to videos in general, such as scaled, rotated and blurred frames on different datasets
-
- Phase 3:
- Produce with Streamlit and serves in real-life server: Allow users to upload their own videos, and customize on parameters
- Phase 4:
-
More Generalized Datasets:
Transfer learning on Detectron2 such that detection works robustly in poor/abnormal videos, such as videos taken in severe weathers
-
Volia!
If you are interested in my projects or have any new ideas you wanna talk about, feel free to contact me!

A BEER would be perfect, but remember NO CORONA! 🍻