SPLENDID computer vision project makes your photo 3D!!!!!
Your photo speaks to you!


Just AMAZING right? I was as astonished as you guys. This fantastic project was made by four great researchers Meng-Li Shih, Shih-Yang Su, Johannes Kopf, and Jia-Bin Huang in IEEE Conference on Computer Vision and Pattern Recognition (CVPR), 2020.
Want to try it out on your photos as well? It is ok if you completely have no ideas of computer vision and CNN, just follow my step in setup section below to run all the code in the block in this link! I recommend setting up in Colab, since it take a certain amount of your computer resource to train, and Colab cached for you.
Setup:

-
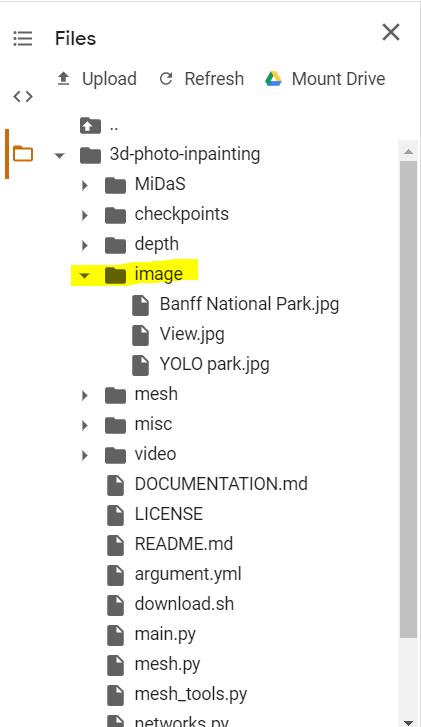
Run all the code before this code block, and drag all the photos you want to make 3D in the highlighted image folder, then run the code block to import your uploaded images.
- Then simply run the last code block below:
!python main.py --config argument.ymland you will need to wait 2–5 minutes for each training batch, depending on your computer specs, and picture attributes
- BOOM! You get the RESULT!
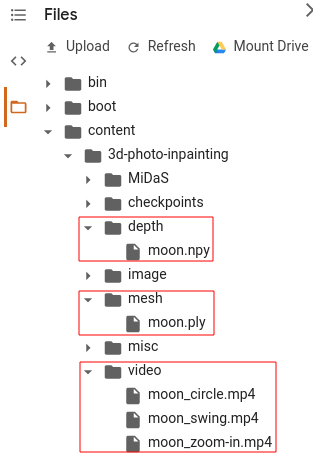
You can find your results in the indicated area. It will output five output visuals, which include depth map estimated by MiDaS, inpainted 3D mesh, and you 3D video demo in circle, swing, and zoom in motions. Simple enough huh? Keep reading if you want to know the logic behind it!
Theory:
How does a machine predict that 3D view just from a 2D photo? I mean, for each object in the photo, if you want to “see” what is behind it, you have to somehow imagine it as a human. When people see a photo, they not only just see it as a static image, but also perceive it as a 3D object that is alive, and even makes up an imaginary scene or recalls some memories. But how does a machine deal with such a complex concept? Can it “imagine”??
Well, a machine cannot imagine, but it can “learn” to “imagine”, or in other words, it can treat data and output in a way like a human. Basically, machine just does what they excel at: calculations.
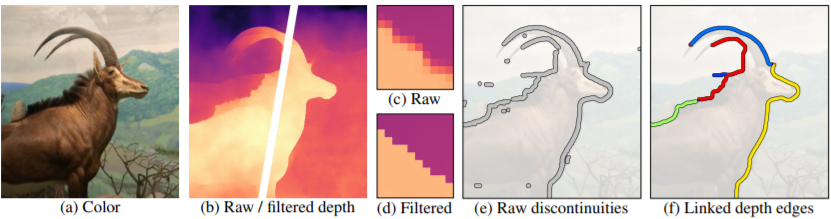
Normally for AI learn RGB-D image, where the D represents ‘depth’, to relive 3D effects. Most smartphones in the market have two cameras right now to capture color and depth in view separately. However, what about normal RGB pictures without depth? Machine predicts! With some standard image preprocessing steps, we can find the depth plot easily (a to d)
With the predicted depth, machine can find where the depth discontinuities are, then categorize then and group to different color sections (e to f). With all the preprocessing preparation, we are going to repair the 3D vision from our 2D photo. The most essential tool we are using is called Layered Depth Image (LDI)
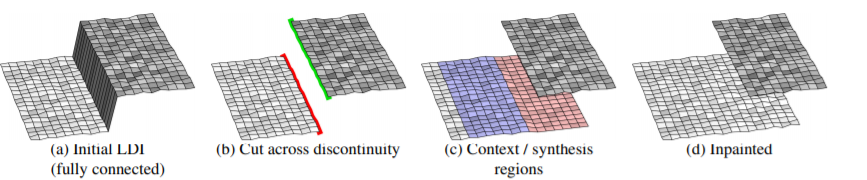
On the edges, the pixel by two sides are connected by a sharp drop (a). The program first cut the drop connection into green and red regions (b), we call them foreground silhouette and background silhouette, spawn a synthesis region based on background silhouette, or context region (c), then merge into the model.
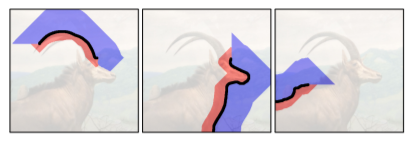
Now, since we have two regions separated already (context region and synthesis region), scientists use three repairing agents to complete the inpainting task: edge inpainting network, color inpainting network, and depth inpainting network. You can check out the resources below to see how those inpainting networks work in detail.
The edge inpainting network repairs the contour between context region and synthesis region, to predict the blocked edges. Then the machine uses color inpainting network and depth inpainting network to imagine the blocked color and depth respectively. After this, we feed the result back to the LDI model, and Bingo! We have the result!
Without further due, play with the model and relive your memories!